Hosting a FastStore + VTEX website
This guide is the first step to integrating your storefront project with VTEX. You will learn how to make your FastStore project publicly available on the internet and have the VTEX Checkout functioning. After completing it, you'll be able to continue configuring other VTEX solutions, such as Order Placed, Login, and My Account.
Before you start
Before proceeding any further, make sure you have set up your VTEX account and have already deployed your FastStore project.
Step by step
Step 1 - Getting the IP address of your website
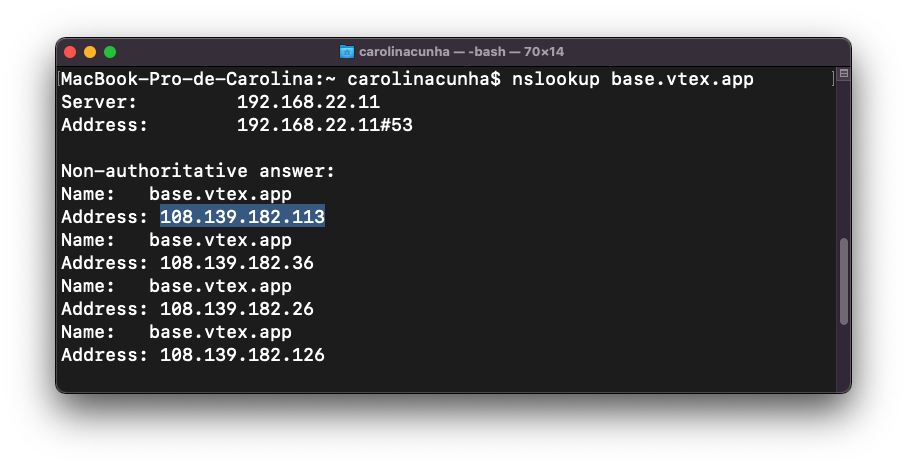
Use the nslookup command as in the following to check which IP address corresponds to your store website:
- Open the terminal.
- Check which IP addresses are capable of hosting your website by running the following command:
- Remember to replace
{URL}with your automatic deployment URL (e.g.,base.vtex.app,base.netlify.app,base.vercel.app).nslookup {URL}
- Copy and save one of the IP addresses presented below the
Non-authoritative answermessage for further usage.
Step 2 - Configuring your website domain
Now, it's time to make your website publicly available on the internet.
caution
If you still need to configure other VTEX solutions, please use a fictitious domain name when taking the following steps. Then, once you set up all the desired integrations, repeat this guide using your final domain to make your website publicly available to end-users.
- Access your domain provider website.
- Configure a domain name (for example,
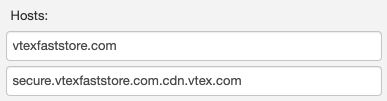
vtexfaststore.com) that points to the IP address you saved in the previous step. Check the documentation of your domain provider for more information. - Now, configure a subdomain named
securethat points tosecure.{rootDomain}.cdn.vtex.com, where{rootDomain}is the complete address of your website. For example,secure.vtexfaststore.com.cdn.vtex.com. This subdomain will be used by the Checkout, Order Placed, Login, and My Account pages.
Step 3 - Setting up your VTEX account
Now you must set up your VTEX account to use the domains you configured in the previous step. To proceed, make sure your store is active and in production.
- Access the VTEX Admin.
- Go to Account Settings > Account Management > Account.
- Under the Store section, click on Add new host.
- Add both your main domain and subdomain to the list.
- Click on Save.
Step 4 - Updating your FastStore project
Back to your FastStore project, you must also configure your project to point to the right addresses and domains.
Open your FastStore project in any code editor of your preference.
Open the
store.config.jsfile.Update the
storeUrl,secureSubdomain,checkoutUrl,loginUrl, andaccountUrlproperties as in the following:storeUrl: https://{rootDomain}secureSubdomain: https://{subdomain}.{rootDomain}checkoutUrl: https://{subdomain}.{rootDomain}/checkoutloginUrl: https://{subdomain}.{rootDomain}/api/io/loginaccountUrl: https://{subdomain}.{rootDomain}/api/io/account Take the follwoing example of how this code block would look after configuring a store with thevtexfaststore.comroot domain andsecuresubdomain:
store.config.js...
// Default channel
channel: '1',
+ // Production URLs
+ storeUrl: 'https://vtexfaststore.com',
+ secureSubdomain: 'https://secure.vtexfaststore.com',
+ checkoutUrl: 'https://secure.vtexfaststore.com/checkout',
+ loginUrl: 'https://secure.vtexfaststore.com/api/io/login',
+ accountUrl: 'https://secure.vtexfaststore.com/api/io/account',
// Lighthouse CI
lighthouse: {
...Save your changes.
Open a Pull Request and commit your changes.
Next steps
To provide shoppers with a full checkout and post-purchase experience, make sure to check the following documents:
- Integrating your FastStore project with VTEX Login.
- Integrating your FastStore project with VTEX Checkout.
- Integrating your FastStore project with VTEX Order Placed and My Account.